
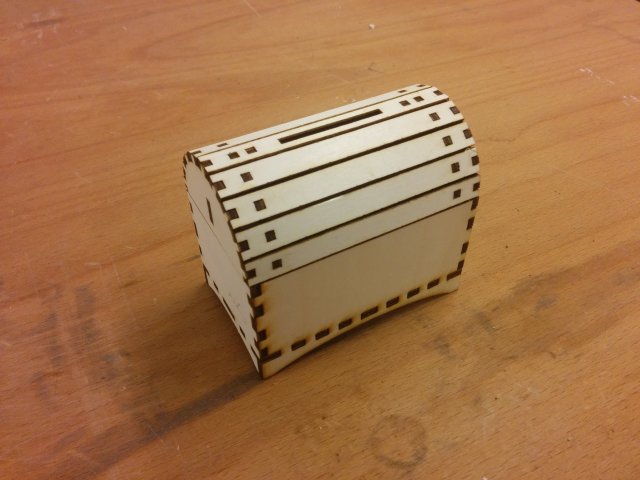
 My kids are old enough to have their first coins and they were begging for a piggybank to stash their valuables. I had the idea to build them an actual treasure chest, out of plywood.
The final design is available on thingiverse, this post will focus on how to design and build it.
Design

I used Inkscape to do all of the design from scratch. The first step was to guess dimensions on the box: I knew I wanted a “round” lid, made of multiple planks held on a structure.
I knew I wanted to use 3mm thick plywood or MDF (basically, what I had readily available). I decided to have 9mm wide “planks” (to have holes nicely in the middle). I knew I needed an odd number of planks on the top of the chest. After some tweakings in a google sheet docs, I found that 9 planks gives a nice internal radius of 26mm (rounded in mm). ratio width/length is based on the golden ratio (when in doubt, use that).
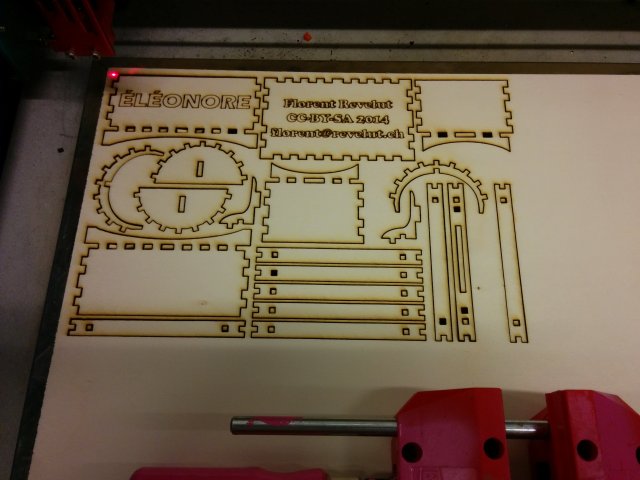
The trick with laser cutting is that you don’t have to plan for margin in the assembly : the laser itself is wide enough to have “tight” links when building things together. as we use 9 planks, the top is a 18-gone, cut in half. I heavily rely on guides to be accurate, using snaps.
The bottom of the chest is a simple box, made with my Inkscape plugin and tuned to have “feet”.
All of the other pieces are done using guides for precise measuring, binary operations and cloning. The svg document in thingiverse has a lot of hidden layers which show most of the creation process (at least, a dump of my brain)
Assembly
A few pictures are better, a more detailed text description is available in the thingiverse document.


Much cool, wow.
LikeLike
Pingback: Misc week 15-23 | Bruce's hideout
Great I have a ULS Laser that I could cut the pieces with the laser !(Right?)
LikeLike
Right, you need to configure your ULS laser to cut the blue line and engrave the red line. Then follow the assembly and enjoy 😉
LikeLike