
I’m doing quite a lot of video conferences from home and I’ve decided to improve my setup, to have better quality, and ideally, at some point, be able to use it for some Youtube tutorials. I still somehow naively think I’ll eventually find some time to do that…
Anyway, as I’ve discovered recently and explained in my last post, it happens my light setup is sub-optimal. I’ve looked at theory and at option for buying lamps, but I couldn’t found anything satisfying. My main reproaches were:
- boo bulky, too professional: I don’t have much space and I definitely don’t want to have stands (or drill too many holes in my walls)
- awfully expensive: I’m not ready to invest several hundreds of francs/dollars in this topic, and this seems to be the starting price
- disputable quality: I found some cheap solutions for filming with DSLR in China, but they require batteries to run. This is not eco-friendly (I got 230V at home) and the few which had technical specs were indicating currents in volts… Too shady for me.
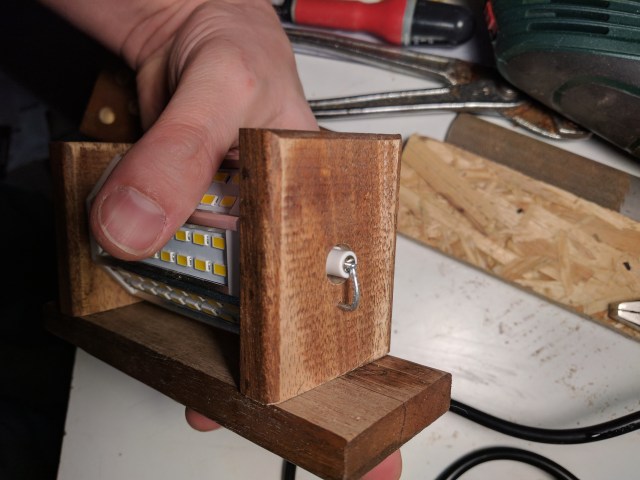
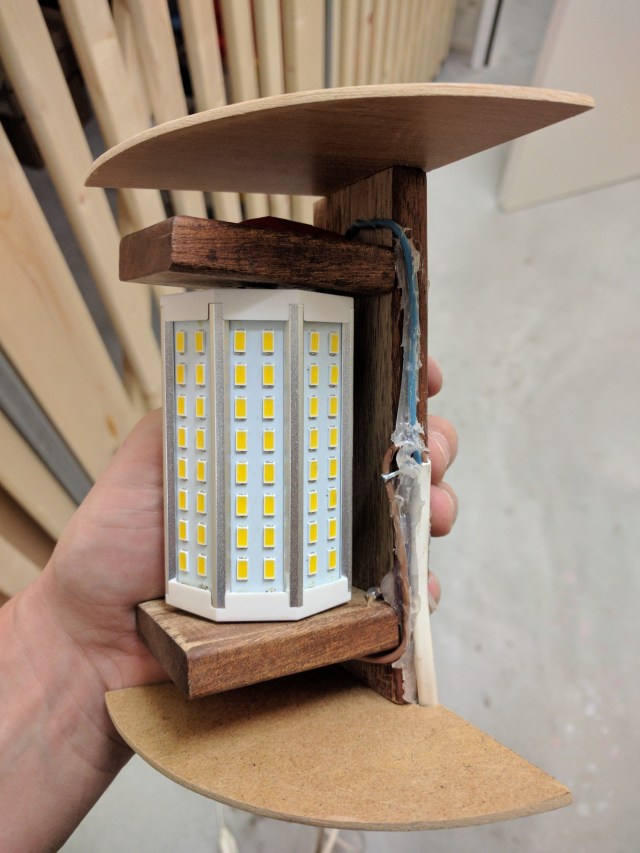
I happened to have a 30W LED R7s lamp that I bought to replace an halogen and we ended up not using, because it was not enough brights nor dimmable.
Time to hit the workshop and make stuff happen. I scavenged the cable from a broken lamp that was lying around and as usual, got some wood tiles from my trusted IKEA RUNNEN stash. Here is a quick run of the project. As usual, pictures can be seen in original size by clicking them.
As a quick note, I used very little hardware:
- oscillating tool (FEIN-like) for cutting
- power drill for drilling / screwing
- soldering station
- hot glue gun
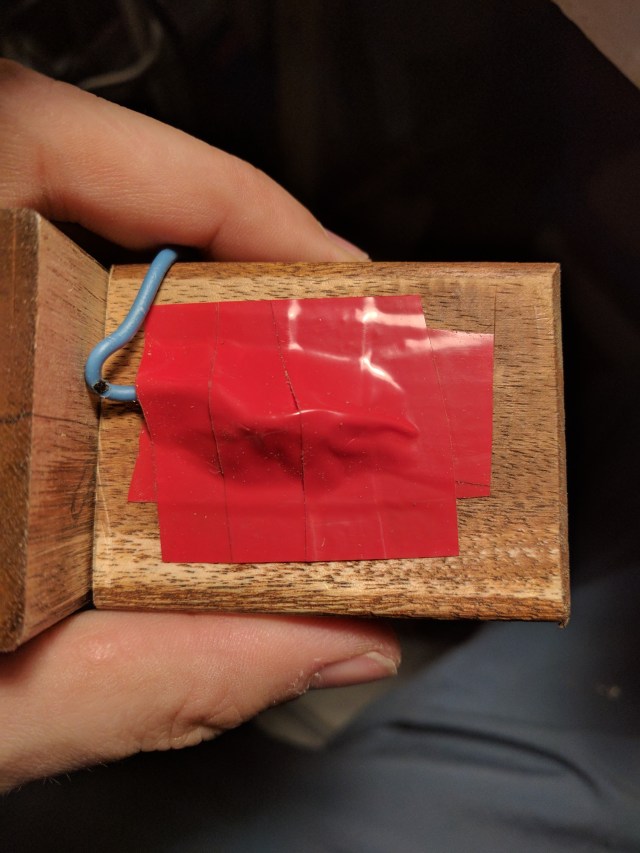
First step is to build the lamp holder: cut a tile in 2, drill a 10mm hole, affix to the other with screws. A nail is used on each side to hold the bulb in place and ensure connectivity

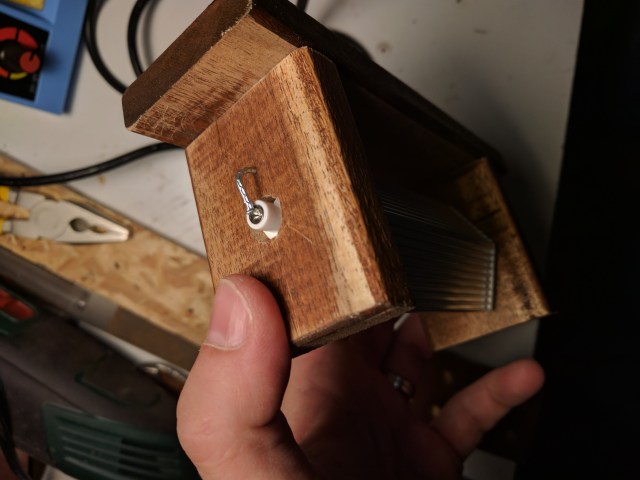
Next step is to connect the wires to the nails. Some simple soldering: put soldering on the wire, bend in place, then solder to the nail. Surprisingly, the nail had no issue properly holding the solder. Then, isolate with tape and cut to have it look cleaner.
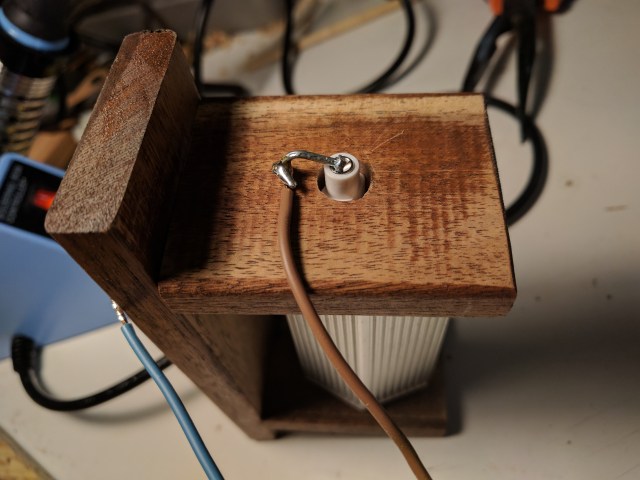
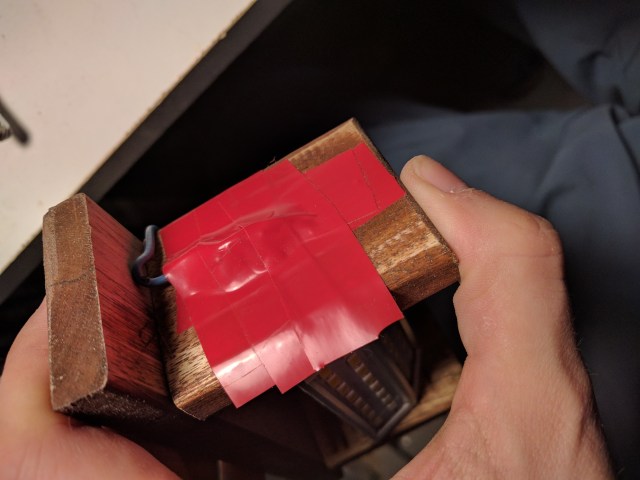
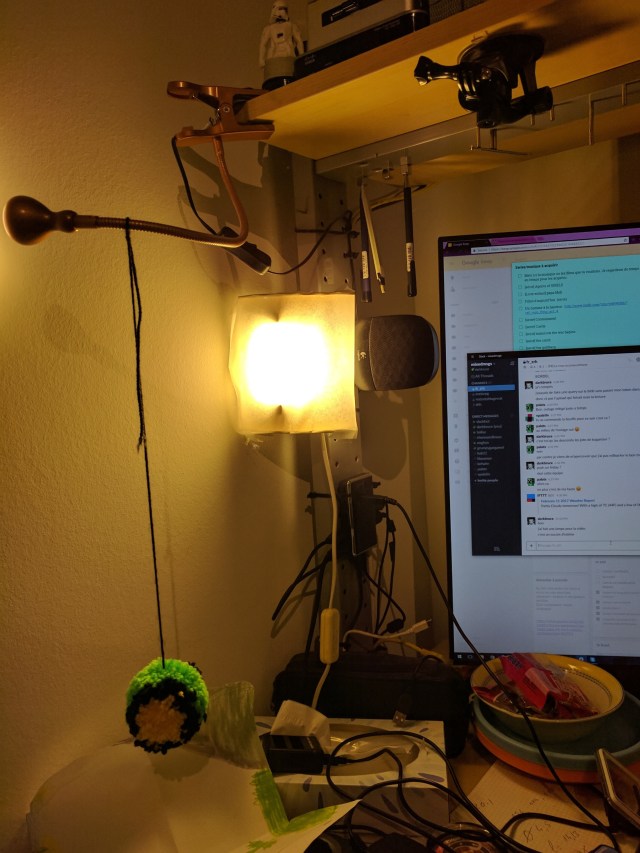
Next step is to affix diffusers, to have a nice and smooth light. The power supply wire is held in place with a nail and hot glue. I cut pieces of disks from mdf (the back of an old billy shelf) then nailed them on top and bottom. One of them had to have a small hole for the cable and I broke one of my small file 😦 Next time, I’ll pull the dremel. I used cooking paper (sulfur paper) as diffuser: I’m a bit scared about the fire hazard and I want to make sure it doesn’t produce too much heat. The diffusing paper is held in place by the engineer best friend, tape. This will have to be reworked.
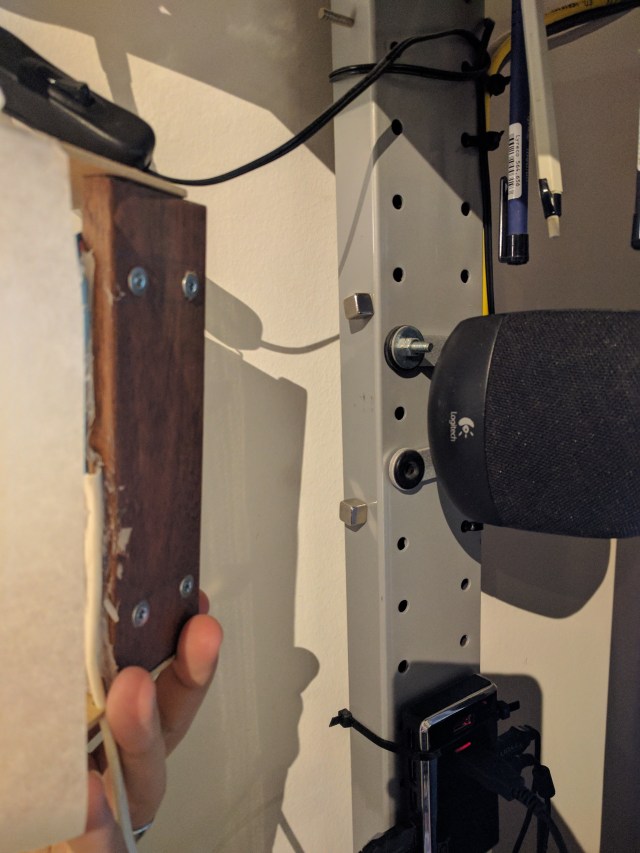
 The lamp is held in place with 2 powerful magnets (1cmx1cmx1cm neodymium), on the chassis of my desk
Lessons learnt:
- I need a second lamp for testing, this is so powerful, this completely breaks the balance of my setup
- Baking paper is very brittle and super hard to work with
- Hot glue is evil, each time I’m using it, it’s worse. But it pulls me. So evil.
- Lamp is too powerful, I should use a stronger diffuser, further away (bigger disks). Maybe a simple piece of white paper will do
- Some solder drop on my pant, I now have a hole

- Simple projects like that are better done by trying in the workshop rather than trying to do plan, I actually tried and failed a 3D model on wednesday evening to do with the laser cutter. The result would have been nicer and more reproductible, but I had way more fun prototyping 🙂
- The heat is under control, less scary than expected
Conclusion
Overall, this is worsening my current setup but I’m pretty happy. This was a quick hack (2.5 hours end-to-end) and this worked as expected, with very little to update. I’ll definitely order a new bulb and build a second lamp.
